The method of the tiling is a practical problem that plagues many buyers. How to install tiles efficiently and beautifully? What is the best way to lay tiles? A good tiling method not only looks good but also increases the experience of using it and reduces costs and wear and tear. The tools used in the construction are also very important, choose the right tools can also do more with less. Focus on the tile paving tricks and considerations for you.
Table of Contents
Preparation
Before the tiles are laid, the color and texture of the tiles are pre-numbered according to the floor design drawings and design requirements. In the process, the presence of damaged tiles will be picked out, to facilitate the later laying of tiles. If the tiles enter the site, the tiles need to be sorted out one by one, classified, and placed, attention should be placed on a safe area to avoid damage.
Tile Immersion.
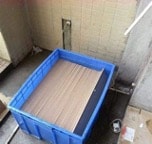
Before tile-laying, the tiles should be put into the water basin for soaking, the general time in more than two hours, until the tiles are not bubbling, the general water absorption rate of less than 0.5% tiles without soaking. After the tiles fully absorb water, the paving time will no longer absorb water in the material, thus avoiding the phenomenon of tile falling off, hollow drums. With a brush on both sides of the tile brushed again, the tile surface dust scrubbing off, especially the back of the tile to be cleaned so that the adhesion of the tile is very strong, not easy to hollow drums after the paste. It is this insignificant process, which is often ignored. At the same time, the ground floor needs to be cleaned of dust and debris, and then wet with water to reduce the generation of ground dust, but also to allow the ground to absorb some moisture.
Horizontal lines.
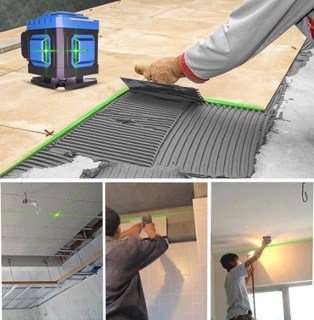
When pre-paving, it is necessary to level the wall first, making the plumb line in the appropriate place, to determine the size of the tile out of the wall. Then determine the location of the horizontal line, this operation so that the floor tiles can be paved horizontally and vertically. But manual measurement errors are often large, resulting in the overall effect is not good, and later also easy to arch, now professional workers are using an infrared level to paste tiles, such professional, convenient equipment to paste out the tiles neat and nice, is currently one of the advanced tools for tiling.
Selecting the adhesive material.
There are basically two types of auxiliary materials for tiling: cement mortar and tile adhesive.
There are two methods of paving traditional cement mortar materials: dry and wet paving, dry paving is not completely mixed with cement and sand, only part of the water; wet paving is completely mixed with cement and sand, etc. to mix into a slurry to pave, cement sand ratio should be mastered, normal is 1 to 2, that is, one cement, two parts of sand, and even, not too much water, sticky on.
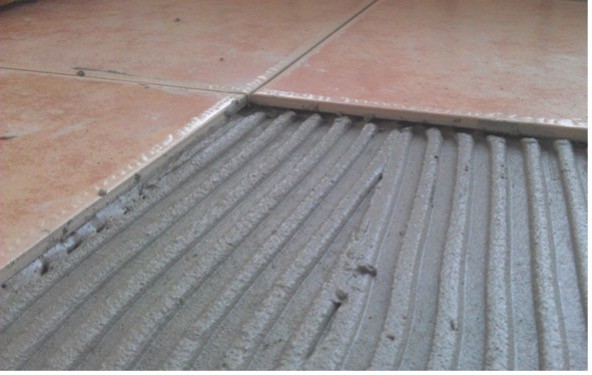
Choose Tile Glue, a permeation and aging-resistant supplement that freeze-thaw requires only a thin layer to securely adhere tiles. Tile Glue has a very strong bond, several times stronger than cement mortar. Tile glue is especially suitable for floor tiles on project walls, without peeling and hollow drum phenomenon. It is easy to use and easy to construct. But it should be noted that the prohibition of adding cement, sand, and other substances when mixing tile glue, tile back of the powder, mold release agent needs to be cleaned up, stirred tile glue needs to be used up within 2 hours, has been dry solidified mortar is prohibited to add water to mix use.
Leave Seam Pavement.
The size of the brick body draws a good line, when drawing the line needs to reserve the gray seam, the outer wall brick 3MM, the inner wall brick 1.5MM, ordinary floor tiles 2-5MM, antique tiles 5-15MM, to avoid the concrete and ceramic thermal expansion and cold shrinkage coefficient of different and arched. In the process of paving, tools can be selected to leave a seam cross, which is convenient to control the gap.
Pavement levelling.
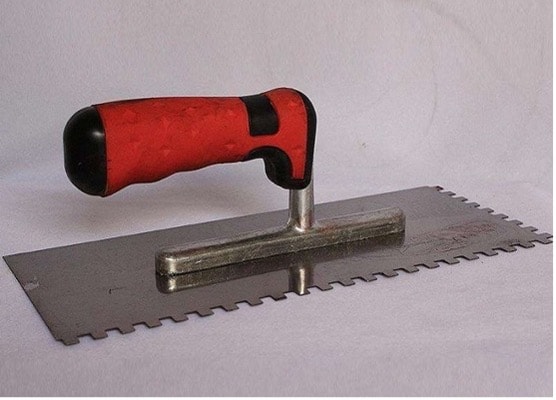
When the tiles are started, the construction should start from left to right, from the door and window positions. Use the shovel to spread the cement mortar evenly on the back of the floor tiles, and gently lay the tiles on the ground grass-roots level, using a rubber hammer to beat gently, so that the cement mortar is more balanced and fits the ground. In the process of laying the tiles, the trowel is used to scrape the mud and level the tiles. We also use it when we use cement mortar for tiling. When using tile adhesive, we need to scrape the tile adhesive with the trowel to avoid hollow drums. Paving tile leveling, but also use tile leveler, more foreign use, if you are a novice in tiling, completely with the help of these small tools, both efficient and beautiful.
Cleaning, Maintenance.
Stains and dust need to be cleaned from the surface of the tiles after they are laid, and here are some tips for cleaning and maintenance.
If the surface is heavily contaminated, especially with stains that are difficult to remove, wipe it with a 10% concentration of the dilute hydrochloric acid solution. If cleaning with dilute hydrochloric acid, be sure to rinse with tap water at the end.
After the tile glaze cleanup can be sprayed on the surface of a thin layer of Biolite brightener, and then wipe again with a soft cloth, you can keep the tile surface bright and not easily contaminated.
It should be noted that in the paste floor tiles should be promptly cleaned up the mud and other debris in the tile joints, and wipe away the stains with a damp cloth. If you wait until the mud and pulp dry hard to clean up, not only time-consuming, the effect is poor, it is more likely to bring permanent damage to the tile glaze.
Tile Acceptance.
After 12 hours of paving, meet knocking brick surface for inspection, if found empty drum sound should be re-paved. Floor tile hollow drum scene manipulated within 3%, the primary channel of the hollow drum is necessary to rework, 3% single refers to a single block corner hollow drum, the whole block is not hollow drum. The use of 2 meters long against the ruler and vernier ruler plug check flatness, 2 meters within the error does not exceed 2mm. floor tile paved and then check the flatness of error, hollow drums, color difference, etc., with thick cardboard or plywood, old carpet, etc. to conceal all the maintenance, between the plate joints it is necessary to use wide paper tape posted tightly, to avoid debris into.
These are the tips and tricks I’ve shared on tile paving, and I hope they’ll help you if you want to learn more about tile paving. Welcome to check our tile designs: Crrara/Calacatta Series and Crema Marfil Series.

